For accessing items on this page without scrolling, click on the header above to see the menu.
If you are new to this website and have never used the Editor/Player:
- You need to be logged in to use the Editor/Player;
- The first step on the Editor/Player is to click on File / List system songs to open the system song list, and either:
– load a system song, or
– load 'A - Song template' if you want to arrange your own song.In the latter case, change the song name and if needed some of the other song settings – above all, the key – in the form that opens on loading the template, and click on 'Save changes', which saves the song / template under the song name you entered. It is saved to a virtual section of the database called MySongs, associated with your login name, which is either your email address (recommended) or any other name.
If you just load a system song, saving the song saves it under its name to your MySongs.
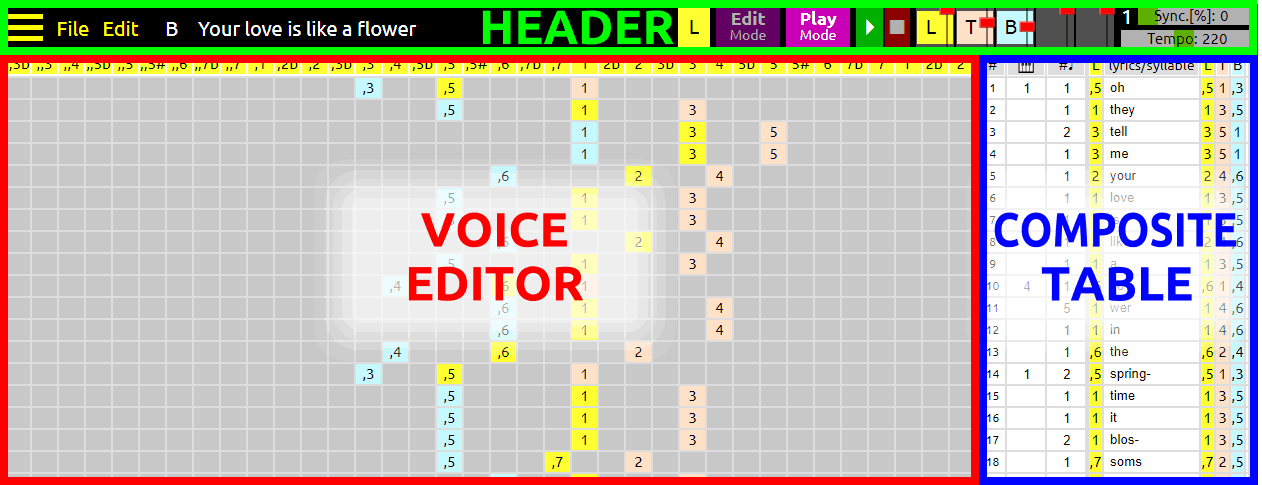
Now, here are screenshots of this website's cornerstone, the Editor/Player where you load, create, and edit voice files, and listen to the harmonies.
In order for the Editor/Player to work properly, in the settings of your browser, you need to allow sites to save and read cookie data.
The Editor/Player user interface has 3 main areas: header, voice editor, and composite table.
Harmony Singing 101 Editor/Player features explained in hotspots
Hovering over the red hotspots displays the info which is also displayed in the table below this screenshot, including keyboard shortcuts.
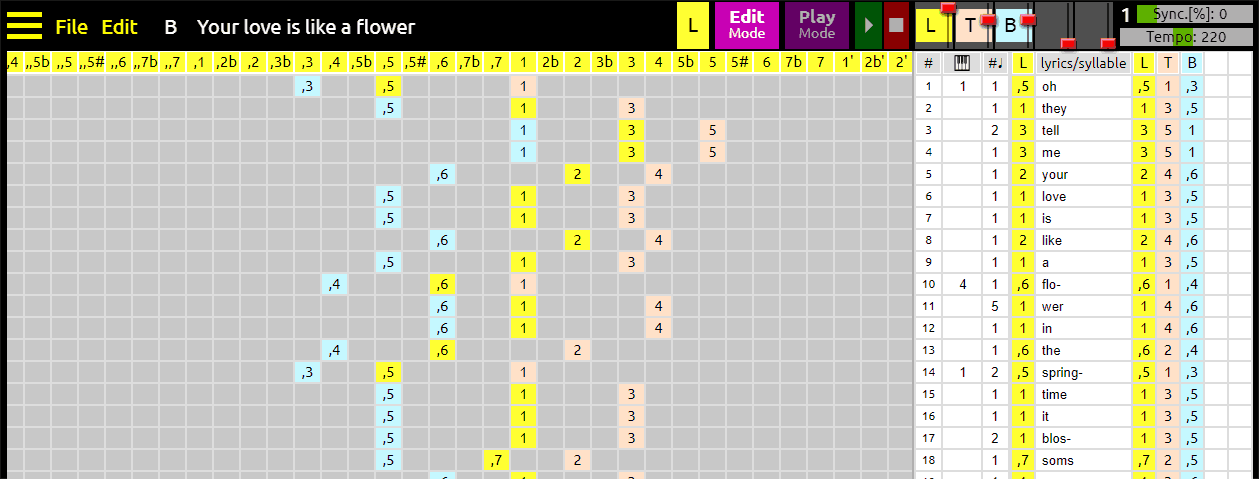
- song name
- key and key mode
- syncopation
- tempo preset
- default voice
- voice symbols and colors
- unison setting.
The selected voice is displayed to the immediate left of the lyrics column.
Shortcut: Press the space bar to play/stop the song. Unlike the play button, the space bar is active even in Edit mode for quick checking of the result of your editing.
The number to the left of the slider toggles between 1 and 2 and determines if the beat shall be on the first or on the second note of the melody. If set to the other note, the syncopation is reversed, and it is easy to tell the correct number because one setting will sound natural and the other quite awkward. Unless the melody in your song starts with a single pickup note, the beat will be on the first note.
Both the sliders and the syncopation toggle are operational during playback.
In Edit mode, hovering over a table cell colors this cell in the color of the selected voice, and the corresponding note is displayed above it.
In both Edit and Play mode, click on a cell with the right mouse button to hear its pitch. In Edit mode alone, left-clicking a cell enters the respective note in the cell. So, if you are not sure from the note numbers which cell corresponds to the note that you want to enter, right-click the cell to hear its note, and if OK, left-click it to insert it.
Left-clicking on an empty cell adds the respective note to this cell and deletes any note of the same voice in that row. Clicking on an already present note of the selected voice deletes it.
If you want to select just one row, double-click it.
Each one of the following actions will deselect any selection:
- Clicking on the # sign on top;
- clicking anywhere on the row counter column;
- pressing the Esc key;
- clicking the respective item in the edit menu.
For play mode...
- Select a row (single click) from which you want to start the playback;
- If you select a span of rows, clicking the play button loops over the selected rows, playing the enabled voices until the stop button is pressed, or until the selection is deselected, upon which playing continues on the following rows.
You can also select a span of rows or just one row (by double-clicking it) to have the harmony generator create harmonies for just the selected row(s).
Exception if you use the generator:
If a sung chord is on a beat, but is not identical to the chord played, the played chord needs to be replaced with the sung chord by just entering the sung chord on this row.
Example: played chord = 1, sung chord 7b. You may enter either '7b' or '1:7b' to be clear, but in any case, you need to cancel 7b on the next row by entering '1' or the appropriate chord number there. Please see the link in the table below for a full description.
Click the cell to enter the chord just on those rows where the change happens including the first row. Only enter the number of the chord as it relates to the song key (1). Ex.: If the song is in the key of G, and the chords go from G to C, enter the number 4 in the text field in the row where the change of chord takes place.
The chord mode/extension following the chord number may be there because that's what the band plays, OR – in case the harmony generator is to be used ‐ to help the generator pick suitable notes for harmonies – explanation on the Harmony Generator page (link in the instructions table below). Enter the mode/extension (if other than major) such as m, 7th etc. as follows: After clicking the cell and entering the number for the chord, press the up or down arrow keys on the keyboard repeatedly until the field displays the desired chord, such as 5_7th.
You can also enter a mode/extension the same way without chord number if there is no chord change on this row. Just click in the text field and use the arrow keys. There, you have the option to combine any mode/extension with a preceding underscore _ or with a preceding <. _ means that the mode/extension remains in effect until changed or canceled by the entry _x further down/ahead, also available via the arrow keys. < on the other hand is an 'injected' mode/extension effective just for this very row. Extensions with the < prefix are entered with the arrow keys just like above, but by simultaneously pressing the Alt key.
If there is a chord change on an offbeat, enter this chord on the row and enter the letter 'b' (for 'beat') in the field right above the chord. This tells the harmony generator that the preceding row is on the beat and the chord on the offbeat.
Clicking on the keyboard icon on top expands (and half-collapses) the chord column to make extensions better visible.
How to define sung triplets:
- In the beats column, on the first row of the triplet, write the number of beats that the triplet will span. This must be an even number: mostly 2 or 4.
- In the beats column, leave the second and third rows of the triplet blank. These two fields will autofill with '0's.
- In the lyrics column, add the number 3 (or 3_ or 3- for better readability) in front of each of the three syllables constituting the triplet.
You can use the Tab key to select the next field down and Shift+Tab to select the next field up.
Also, after clicking on a field, pressing the arrow up or arrow down key increases / decreases the number in the field.
Clicking on the beats icon on top or pressing Alt+b separates the beats (right) from the offbeats (left) to have a visual clue which syllables are accented and which ones are not.
Click on any note to listen to the sung chord of all voices on just this row and at the volume set with the sliders.
Clicking on the voice symbol on top or pressing Alt+n expands/collapses the 'Virtual notes' column for voice 1. How to use this column is explained on the Harmony generator page – see link in the table below.
How to define sung triplets – see beats column.
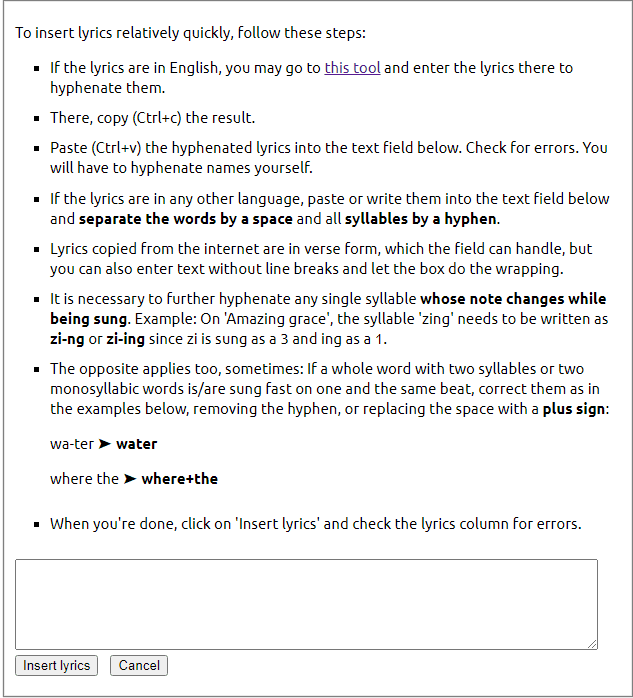
You can enter syllables manually, but it's more convenient with the Insert lyrics tool which you can open from the Edit menu, or by pressing Alt+l, or by clicking on 'lyrics/syllable' on top of the column.
Click on a voice name on top of the column to gray out this voice on the column as well as in the editor window to make another voice better visible. A second click restores the voice's color.
Editor/Player Instructions table
|
Menu for loading the pages of this website. |
|||||||||||||||||||||||||||||||
|
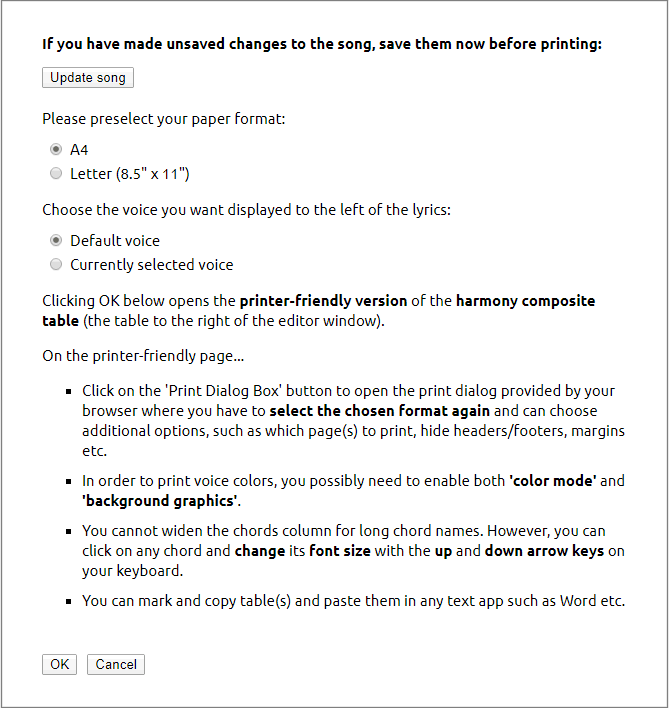
Menu for listing, saving, and printing songs. You can list/load system songs or songs from MySongs, any of which you can edit and save to MySongs. You cannot save songs as system songs, or locally. MySongs is a virtual part of the webserver's database. The List MySongs submenu lists the contents of MySongs, where, besides loading, you can delete or rename songs directly. |
|||||||||||||||||||||||||||||||
|
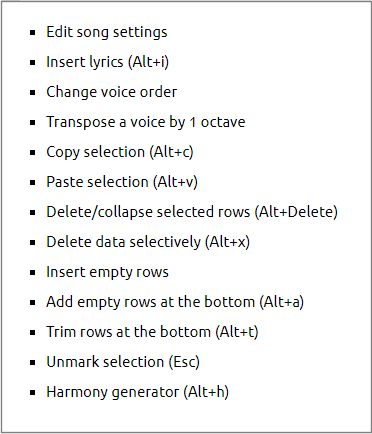
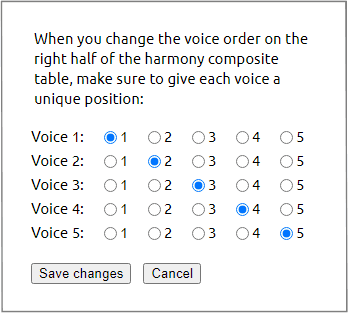
Change voice order submenu:
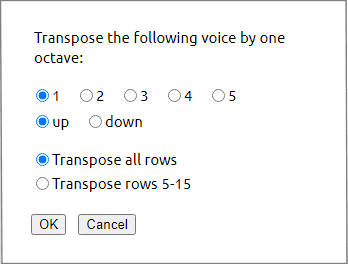
Transpose voice submenu:
Regarding the item Harmony generator, visit the Harmony generator page. |
|||||||||||||||||||||||||||||||
|
Key, key mode, and name of song currently displayed. Clicking on either one opens the 'Song settings' menu. In the song settings the following items are stored:
|
|||||||||||||||||||||||||||||||
|
Displays the voice currently selected for editing, and clicking on it selects the next available voice. The voice names and their colors are displayed as chosen in the Song settings. If you want to add a new voice, you need to first create it by giving it a name and color in the Song settings. The selected voice is displayed to the immediate left of the lyrics column. |
|||||||||||||||||||||||||||||||
|
Enables/disables associated features. |
|||||||||||||||||||||||||||||||
|
Plays voices enabled for playing either from beginning to end, or from the marked row, or loops through a row selection. Shortcut: Press the space bar to play/stop song. Unlike the play button, the space bar is active even in Edit mode for quick checking of the result of your editing. |
|||||||||||||||||||||||||||||||
|
Stops all voices. |
|||||||||||||||||||||||||||||||
|
Click to enable or disable voices for playback, and set their volume. |
|||||||||||||||||||||||||||||||
|
Syncopation and tempo sliders for playback. Syncopation in this regard means an alternate rhythm of the sung melody characterized by the temporal displacement of every other note, so that 'pairs' of notes are created. The slider can be set between 0 and 100%, the latter being full syncopation (called 'jazz 8ths' or 'swing 8ths' or 'shuffle rhythm') in which the time between the note pairs is twice as long as the time between the two notes within each pair. The number to the left of the slider toggles between 1 and 2 and determines if the beat shall be on the first or on the second note of the melody. If set to the other note, the syncopation is reversed, and it is easy to tell the correct number because one setting will sound natural and the other quite awkward. Unless the melody in your song starts with a single pickup note, the beat will be on the first note. Both the sliders and the syncopation toggle are operational during playback. |
|||||||||||||||||||||||||||||||
|
Scale of all notes available in the editor, ranging from ,,,5 to 1'''. |
|||||||||||||||||||||||||||||||
|
On the gray grid of the editor window voices are created and edited. The grid can be slid sideways with a mouse button down, but in Edit mode it is recommended to use the right mouse button in order not to accidentally place a note on the grid, which might erase another note in the same row. In Edit mode, hovering over a table cell colors this cell in the color of the selected voice, and the corresponding note is displayed above it. In both Edit and Play mode, click on a cell with the right mouse button to hear its pitch. In Edit mode alone, left-clicking a cell enters the respective note in the cell. So, if you are not sure from the note numbers which cell corresponds to the note that you want to enter, right-click the cell to hear its note, and if OK, left-click it to insert it. Left-clicking on an empty cell adds the respective note to this cell and deletes any note of the same voice in that row. Clicking on an already present note of the selected voice deletes it. In play mode, clicking the play button loops over the selected rows, playing the enabled voices until the stop button is pressed, or until the selection is deselected. Pressing the Esc key or clicking the respective item in the edit menu deselects any selection of rows. |
|||||||||||||||||||||||||||||||
|
Clicking a cell of this column marks this cell, and a second click on it or on another cell up or down selects the clicked rows and all between, with which several operations are possible according to the Edit menu, such as copying the selected rows to paste them somewhere else, or to delete them, or to selectively delete data from them. If you want to select just one row, double-click it. Each one of the following actions will deselect any selection:
For play mode...
You can also select a span of rows or just one row (by double-clicking it) to have the harmony generator create harmonies for just the selected row(s). | |||||||||||||||||||||||||||||||
|
Chords of the song's chord progression, that is, what the instruments play – in most instances.
Click the cell to enter the chord just on those rows where the change happens including the first row. Only enter the number of the chord as it relates to the song key (1). Ex.: If the song is in the key of G, and the chords go from G to C, enter the number 4 in the text field in the row where the change of chord takes place. The chord mode/extension following the chord number may be there because that's what the band plays, OR – in case the harmony generator is to be used ‐ to help the generator pick suitable notes for harmonies – explanation on the Harmony Generator page. Enter the mode/extension (if other than major) such as m, 7th etc. as follows: After clicking the cell and entering the number for the chord, press the up or down arrow keys on the keyboard repeatedly until the field displays the desired chord, such as 5_7th. You can also enter a mode/extension the same way without chord number if there is no chord change on this row. Just click in the text field and use the arrow keys. There, you have the option to combine any mode/extension with a preceding underscore _ or with a preceding <. _ means that the mode/extension remains in effect until changed or canceled by the entry _x further down/ahead, also available via the arrow keys. < on the other hand is an 'injected' mode/extension effective just for this very row. Extensions with the < prefix are entered with the arrow keys just like above, but by simultaneously pressing the Alt key. If there is a chord change on an offbeat, enter this chord on the row and enter the letter 'b' (for 'beat') in the field right above the chord. This tells the harmony generator that the preceding row is on the beat and the chord on the offbeat. You can use the Tab key to select the next field down and Shift+Tab to select the next field up. Clicking on the keyboard icon on top expands (and half-collapses) the chord column to make extensions better visible. |
|||||||||||||||||||||||||||||||
|
Number of beats per syllable (or per pause). The default number of beats is 1. Empty fields are autofilled with '1' on running the generator, or when clicking the #♩ icon at the column top. You can use the Tab key to select the next field down and Shift+Tab to select the next field up. Also, after clicking on a field, pressing the arrow up or arrow down key increases / decreases the number in the field. Clicking on the beats icon on top or pressing Alt+b separates the beats (right) from the offbeats (left) to have a visual clue which syllables are accented and which ones are not. How to define sung triplets:
|
|||||||||||||||||||||||||||||||
|
The voice selected with the voice selector is displayed here. Click on any note to listen to the sung chord of all voices on just this row and at the volume set with the sliders. Clicking on the voice symbol on top or pressing Alt+n expands/collapses the 'Virtual notes' column for voice 1. How to use this column is explained on the Harmony generator page. |
|||||||||||||||||||||||||||||||
|
You can start a new song here, or leave the column blank. If you use it, break down the lyrics into syllables and use one row (or more, depending on the melody) per syllable. Just as with the chord and beats column, you can use the Tab key to select the next field down and Shift+Tab to select the next field up. How to define sung triplets – see beats column. You can enter syllables manually, but it's more convenient with the Insert lyrics tool which you can open from the Edit menu, or by pressing Alt+l, or by clicking on 'lyrics/syllable' on top of the column.
|
|||||||||||||||||||||||||||||||
|
Columns for displaying up to 5 voices that have been either loaded with a song or newly created in the editor window. Click on any note to hear it. Click on a voice name on top of the column to gray out this voice on the column as well as in the editor window to make another voice better visible. A second click restores the voice's color. |
|||||||||||||||||||||||||||||||
|
|

